How to Use CrystalDiskMark
This page walks you through installation, running your first benchmark, and using the main window and menus. Follow the sections in order if you are new to the program.
Installation
You can use either the ZIP (portable) or Installer version. Both are available on the Download page.
- ZIP: Unzip the file to any folder. To update, unzip over the previous installation. No installer runs; just open the executable from the folder.
- Installer: Run the installer and follow the steps. To uninstall, go to Settings → Apps (or Add or Remove Programs) and remove CrystalDiskMark.
How to Start a Benchmark
- Select Number of Test Runs (1–9; default is 5 in v9).
- Select Test Size (e.g. 16MiB … 64GiB; default 1GiB). Use smaller sizes for slow/USB drives.
- Select Test Drive (C:\, D:\, etc.). For network drives, run CrystalDiskMark as a standard user (UAC: No).
- Click All to run all tests, or a specific test button.
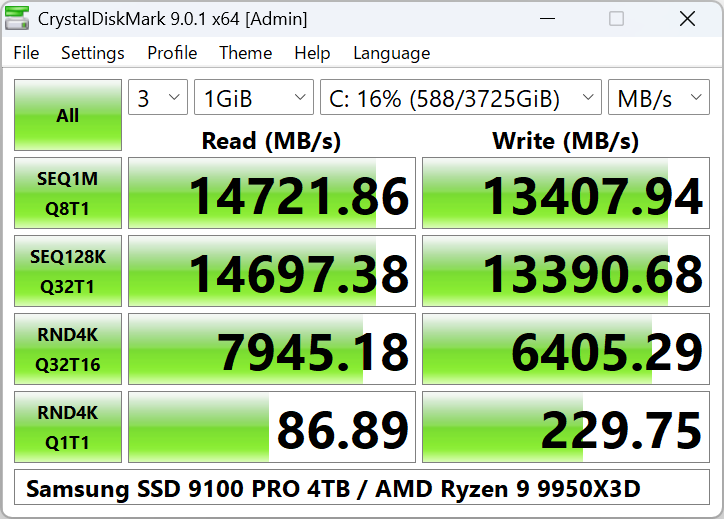
Main window: add images/CDM9Default-en-1.png
Main Window Options
- Number of Test: 1–9. Default in v9 is 3.
- Test Size: 16MiB, 32MiB, 64MiB, 128MiB, 256MiB, 512MiB, 1GiB, 2GiB, 4GiB, 8GiB, 16GiB, 32GiB, 64GiB.
- Test Drive: Any local or network drive (network requires no admin).
- Test Unit: MB/s, GB/s, IOPS, or μs (average latency).
Block size, queue, and thread settings are in Settings → Settings.
File Menu
- Copy — Copy benchmark result to clipboard.
- Save (text) — Save result as UTF-16LE text file.
- Save (image) — Save as PNG, JPEG, or BMP.
- Exit — Close the application.
Settings & Test Data
Test data: All 0x00 (0 Fill) or Random. On some SSDs, results can differ between the two.
Default
- Random: 4KiB Q1T1, 4KiB Q32T1
- Sequential: 1MiB Q1T1, 1MiB Q8T1
NVMe SSD
- Random: 4KiB Q1T1, 4KiB Q32T16
- Sequential: 128KiB Q32T1, 1MiB Q8T1
Profiles
Profile menu: Default, Peak Performance, Real World Performance, Demo. Standard edition also has [+Mix] variants (read/write mix).
Next Steps
- To interpret the numbers (SEQ, RND, IOPS), read Understanding Benchmark Results.
- If a test fails or the drive does not appear, see Troubleshooting and FAQ.